The Fare Import Upload feature allows you to manually upload a CSV file to process fare data. This data is validated against schedule data and is used by your agency's finance, executive, planning, and operations teams to calculate various KPIs (Key Performance Indicators) and can be used at a very granular level to determine underperforming or overloaded trips.
Uploading Files
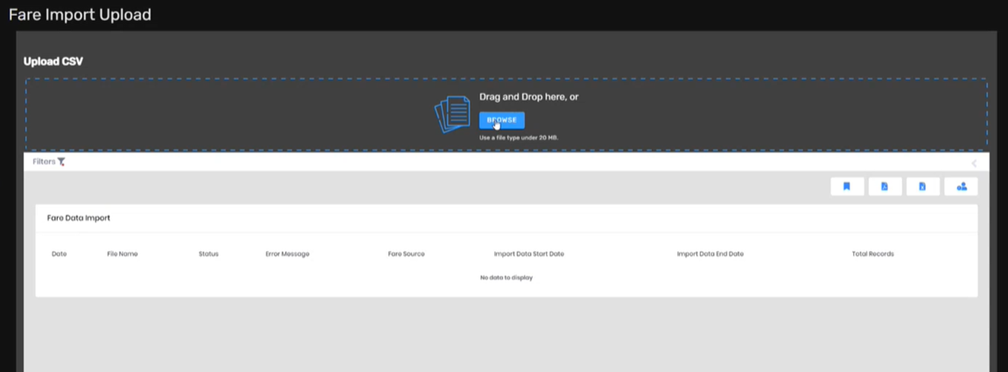
Once you have completed preparing the fare import file, click on the Fare Import Upload card within the Planning & Scheduling suite. You can upload one CSV file at a time.

You have two options to upload:
- Drag and drop the file onto the area marked with a dotted line or,
- Click Browse to locate and select the fare file.
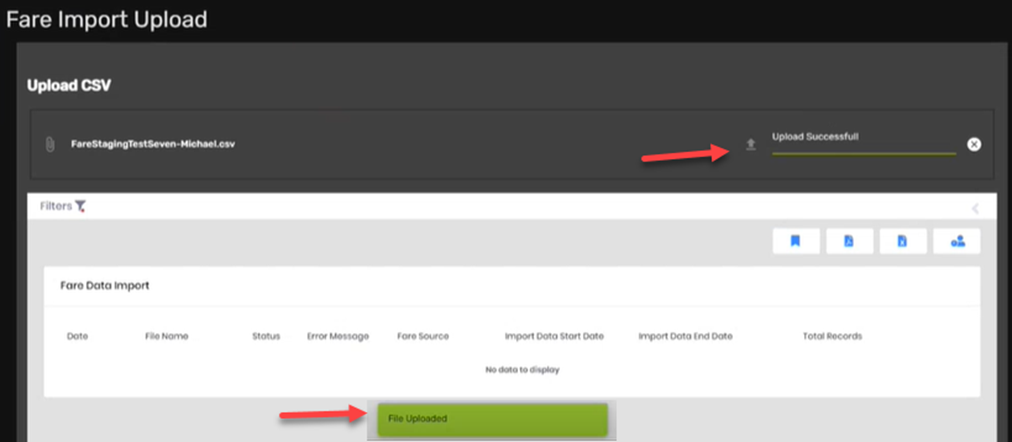
When the upload is complete, two indicators of a successful upload will show in these locations:

- The top indicator shows the file has passed validation.
- The green message at the bottom indicates the file has been uploaded successfully.

Once the data is released from the holding tank - usually at the end of your agency's service day - you should then process your Exceptions.
Upload Reports
Whether your uploads are successful or contain errors, the results will display in two locations:
- On the Fare Data Import grid below the file import
- On the Planning & Scheduling > Fare Import Report page
Note the Status of Successful and the Fare Source of Manual. Manual indicates that this file was uploaded via the manual upload screen.

Filters
The filters button at the top left corner allows you to filter files to a specific Date range or Fare Source. Select a filter and click Apply.

Exports
You can also export this grid to either PDF or Excel by clicking on the Export as PDF button or Export as Excel button at the top right corner.
The Scheduler button allows you to schedule this report to send as an email to, for example, a management department at any desired frequency.