Overview
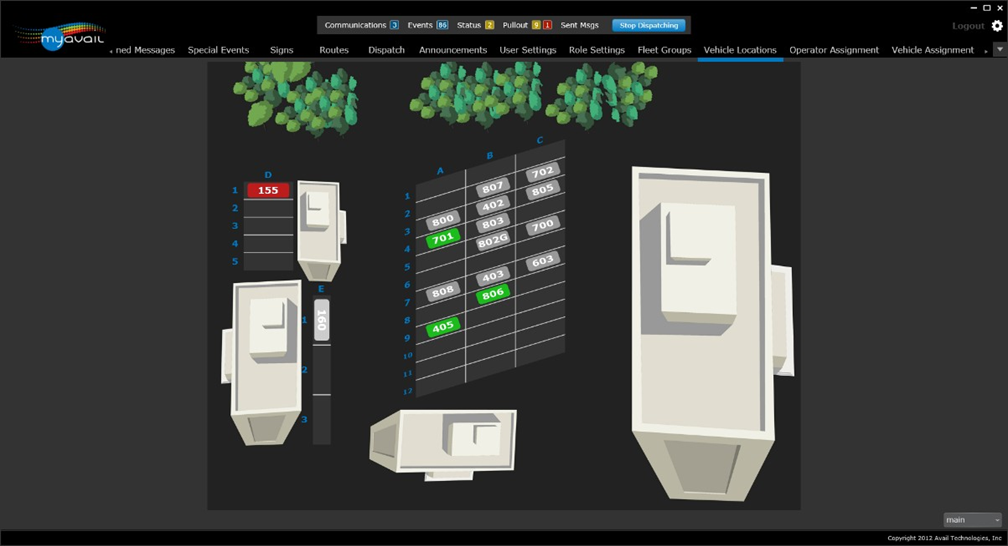
If you have permission to enter vehicle locations in the yard, myAvail displays a Vehicle Locations top-level tab. When you click this tab, myAvail displays the yard map.

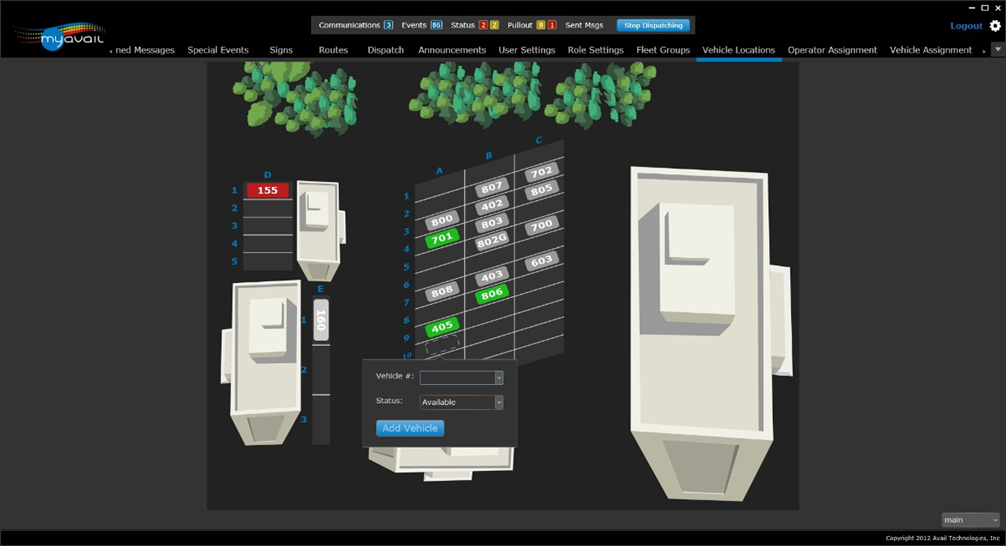
To add a vehicle to a location, click the location in the grid. This displays a popup window as shown below.

In the Vehicle # field, select a vehicle from the drop-down list or type the vehicle number. In the Status field, select Available, Maintenance, or Offsite. The initial status that the popup window displays depends on the grid you are working in. For example, grids located near maintenance, the initial status is Maintenance. Consequently, you do not need to change the status in most cases. After you enter this information, click Add Vehicle to add the vehicle to this location in the grid.
If the vehicle you added was already located elsewhere on the grid, myAvail moves it to this new location. When the yard map displays the incorrect vehicle in a grid location, myAvail provides the option to change the vehicle number or to clear the vehicle when you click that location.
To view a different yard map, select the yard map you want to view in the drop-down list in the lower right-hand corner.
After every change you make, myAvail displays the “Saving Changes” and “Changes Saved” indicators in the lower, right-hand corner.